
Mastering External Composite Cladding Installation: Step-by-Step Guide
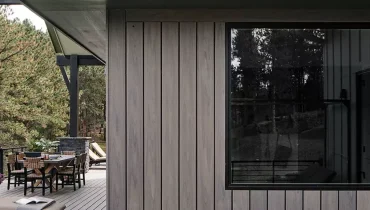
Transforming your home’s exterior into a striking showcase of modern design and durability begins with external composite cladding. This versatile material, a harmonious blend of wood fibers and resilient plastics, offers possibilities for revamping your outdoor aesthetics.
As you embark on this journey of reinvention, our comprehensive guide will be your trusted companion, leading you through the intricate process of installing external composite cladding.
Whether you’re a seasoned DIY enthusiast or a newbie in the world of home improvements, this step-by-step walkthrough will empower you to craft a pristine facade that not only elevates your property’s curb appeal but also fortifies it against the elements. So, let’s dive in and unlock the secrets to mastering the art of external composite cladding installation!
Related reading: Composite Decking is Installed
Understanding External Composite Cladding
Before diving into the installation process, it’s crucial to comprehend what external composite cladding is and why it’s a popular choice among homeowners and builders.
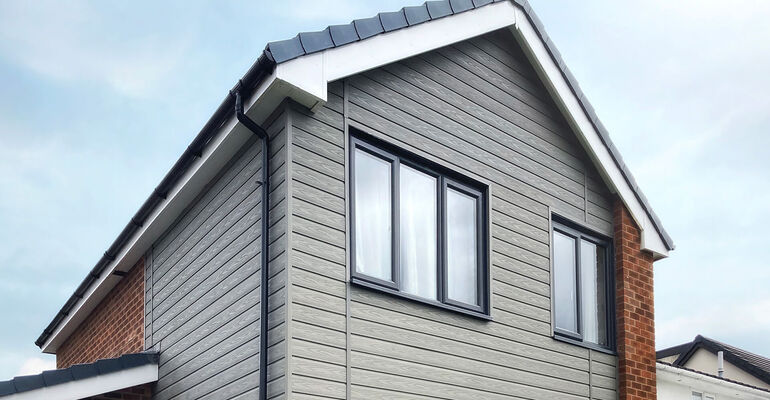
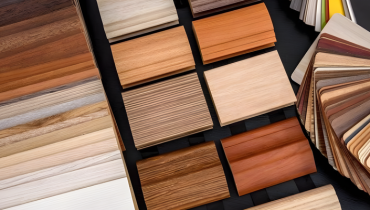
External Composite Cladding refers to a material made from a combination of wood fibers, plastic, and sometimes other additives. This blend creates a highly durable, weather-resistant, and low-maintenance alternative to traditional timber cladding.
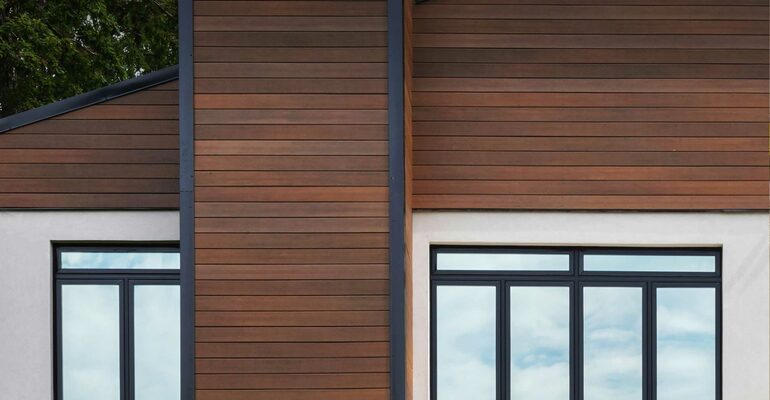
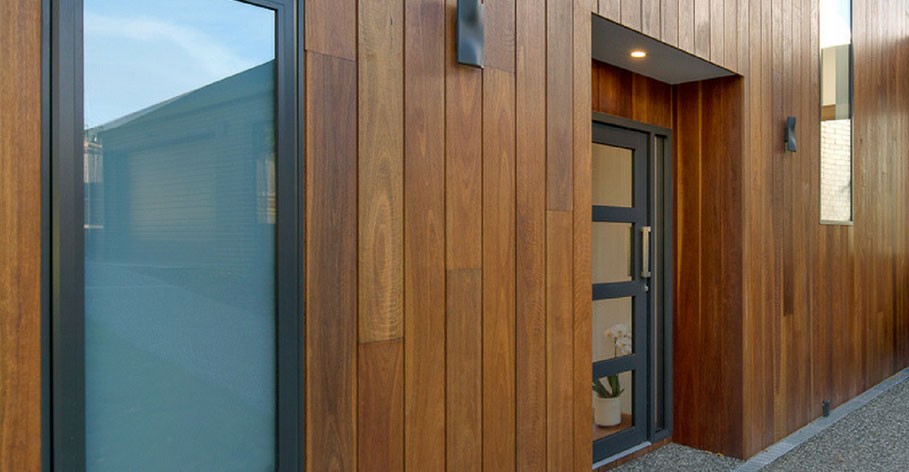
Composite cladding offers a stunning wood-like appearance without the drawbacks of natural wood, such as rotting, warping, or insect damage.
Materials and Tools You Will Need
Having the right tools is crucial to ensure a successful installation of external composite cladding. Here’s a breakdown of the tools you’ll need and their importance in fitting an external composite cladding:
1. External Composite Cladding Panels
This tool serves as the primary building blocks for your cladding project. These panels, typically made of a blend of wood fibers and plastic, mimic the appearance of wood while offering superior durability.
They provide the outer layer that enhances your home’s aesthetics and protection. These panels are affixed to the wall’s framework during installation, forming a weather-resistant shield.
Their versatility and visual appeal make them a key component in achieving an attractive, low-maintenance, and long-lasting external composite cladding that enhances your home’s exterior.
2. Stainless Steel Screws
They are vital in fitting external composite cladding due to their corrosion resistance and durability. They securely anchor the cladding panels to the structure, ensuring long-lasting stability. Because they resist rust and staining, they maintain the cladding’s appearance over time.
These screws provide a strong, reliable connection, crucial for withstanding outdoor elements and maintaining the cladding’s integrity.
3. Measuring Tape
A measuring tape is an important tool for fitting external composite cladding. It enables precise measurements of the cladding area, ensuring panels are cut to the correct size.
Accurate measurements guarantee a seamless fit, preventing gaps or overlaps in the cladding and, ultimately, a visually appealing and structurally sound installation.
4. Circular Saw
A circular saw is a tool for fitting external composite cladding. Its purpose is to make precise straight cuts in the cladding panels.
This tool ensures clean, straight edges and accurate sizing, which is essential for a professional-looking installation. It simplifies the process of trimming panels to fit corners and openings, allowing for a neat and seamless appearance in your cladding project.
5. Carpenter’s Square
This tool is used for fitting external composite cladding. Its L-shaped design allows you to maintain perfect right angles during installation.
By ensuring that your cladding panels are aligned precisely at 90-degree angles, Carpenter’s Square guarantees a level, straight, and visually appealing finish. This tool is essential for maintaining your cladding project’s structural integrity and aesthetics.
6. Spirit Level
A spirit level is a tool with a bubble inside a liquid-filled tube. It’s indispensable in external composite cladding installation.
Placing it on the cladding surface helps ensure the panels are perfectly level and aligned. This prevents crooked or uneven cladding, ensuring a polished, professional appearance and long-term durability for your exterior.
7. Drill and Drill Bits
These tools create holes in the cladding panels and the wall beneath, allowing you to securely fasten the cladding using screws. They ensure a strong and stable attachment, preventing panels from coming loose over time.
8. Screwdriver
A screwdriver is essential for securely fastening stainless steel screws, ensuring the external composite cladding panels are firmly attached to the wall, which is crucial for the cladding’s stability and longevity.
9. Safety Gear (Gloves, Safety Glasses, Ear Protection)
Ensures your safety throughout the installation process, safeguarding against accidents and injuries.
Step By Step Guidelines in Fitting an External Composite Cladding
1: Preparing the Surface
Before you begin installing external composite cladding, preparing the surface is crucial. Start by thoroughly cleaning and inspecting the wall. Remove any dirt, debris, or loose paint. Additionally, check the wall for any structural issues needing attention before cladding installation.
If your wall lacks proper waterproofing, it is time to address it. Install a waterproof membrane or sheeting to ensure moisture won’t penetrate your cladding, preserving its integrity over time.
2: Measuring and Planning
Accurate measurements and thoughtful planning are fundamental to a successful cladding installation. Measure the area you intend to cover meticulously. Calculate the number of panels needed, considering overlaps and necessary cutouts for doors, windows, or other obstacles.
Create a layout design to ensure the panels align both aesthetically and functionally. Decide whether you’ll start from a corner or edge and whether you’ll work horizontally or vertically. This planning stage sets the foundation for a seamless installation.
3: Installing Mounting Clips
If your composite cladding requires mounting clips, follow the manufacturer’s instructions for their installation. Typically, this involves securing the clips to the wall at regular intervals. These clips provide crucial support for the cladding panels, ensuring they stay securely in place over time.
Properly installed mounting clips contribute to your cladding system’s structural integrity and longevity, so be sure to adhere to the manufacturer’s guidelines.
4: Cutting and Preparing Panels
To fit the panels precisely to your wall, use a circular saw to cut them to the required size and shape. Always prioritize safety by wearing the necessary protective gear and following safety guidelines when using power tools.
This step ensures that your panels align correctly and create a clean and polished appearance. Precise cutting is vital for a professional finish in your external composite cladding installation.
5: Attaching the First Panel
Begin the installation by attaching the first panel. Use stainless steel screws to secure it, ensuring it’s level and plumb. This initial panel serves as a reference point for the entire installation, so take extra care to get it right.
Proper alignment at this stage sets the standard for the rest of the panels, ensuring that your cladding looks both visually appealing and professionally installed.
6: Creating Uniform Spacing
To maintain a consistent gap between panels, employ spacer blocks. These blocks are essential for achieving a uniform and visually pleasing appearance in your cladding installation.
Adjust the spacer blocks as necessary to ensure the desired spacing between panels. Consistency in spacing contributes to the overall aesthetic and ensures that your cladding looks polished and well-organized.
7: Installing Subsequent Panels
Continue the installation process by attaching subsequent panels one by one. Each panel should align seamlessly with the previous one. Use your level to verify that each panel is plumb and adjust as needed.
Secure each panel with stainless steel screws to keep them in place. This step demands precision and attention to detail to create a visually pleasing and structurally sound cladding system.
8: Dealing with Cutouts
When encountering doors, windows, or other obstacles, measure and cut the panels accurately to fit around these elements. Properly fitted cutouts maintain the integrity of your cladding system.
After cutting, apply sealant around these cut edges to prevent moisture infiltration. This extra step ensures that your installation remains weather-resistant and visually seamless, even around architectural features.
9: Sealing and Finishing
Inspect the seams and edges for gaps after all panels are in place. Seal these areas using a caulk gun and sealant to create a watertight seal.
Proper sealing is crucial to prevent water damage and ensure the long-term durability of your cladding. Take your time during this step to ensure that every joint and edge is properly sealed for maximum protection.
10: Final Inspection
Complete your cladding installation by taking a step back and conducting a thorough final inspection. Ensure that all panels are securely attached, leveled, and spaced correctly. Check for any visible imperfections or gaps in the sealant.
Address any issues promptly to guarantee a flawless finish. A meticulous final inspection is the last step in achieving a professional-looking, long-lasting external composite cladding installation.
Click to learn: How to Install Composite Cladding
Conclusion
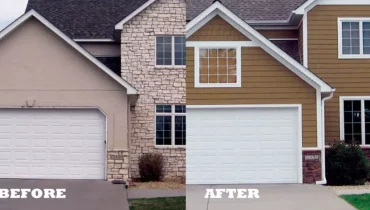
Installing external composite cladding is a rewarding project that can transform your home’s exterior. By following this step-by-step guide, you can achieve a professional-looking installation that enhances your property’s aesthetics and protection.
Whether you’re looking to boost curb appeal or increase the longevity of your home’s exterior, EVODEK composite cladding is a fantastic choice.
Remember, proper installation is key to reaping the full benefits of composite cladding, so take your time, follow the guidelines, and enjoy the lasting beauty and durability it brings to your outdoor space.
By mastering the art of external composite cladding installation, you’re improving your property and investing in its long-term value.So, go ahead and give your home a stunning makeover with the beauty and resilience of external composite cladding!
Related reading: What is Composite Decking? Pros, Cons, and Installation Process
